Okay, first lesson… I want to make this as straightforward and applicable for daily shooting as possible. I’ve narrowed down a few topics that everyone can apply, even shooting in “auto” mode, no matter what camera you use. Some of the topics I discuss do require the use of an editing program (or at least can be aided by one). This can be either an app on your phone or a professional program like Lightroon. I will discuss those eventually as well. For now, I will say this: Good photography boils down to light and composition. Anyone can learn to use the buttons and features on a camera, and anyone can take a picture with an expensive piece of equipment, but it is the mastery of light and composition that will make a photograph standout from a snapshot.

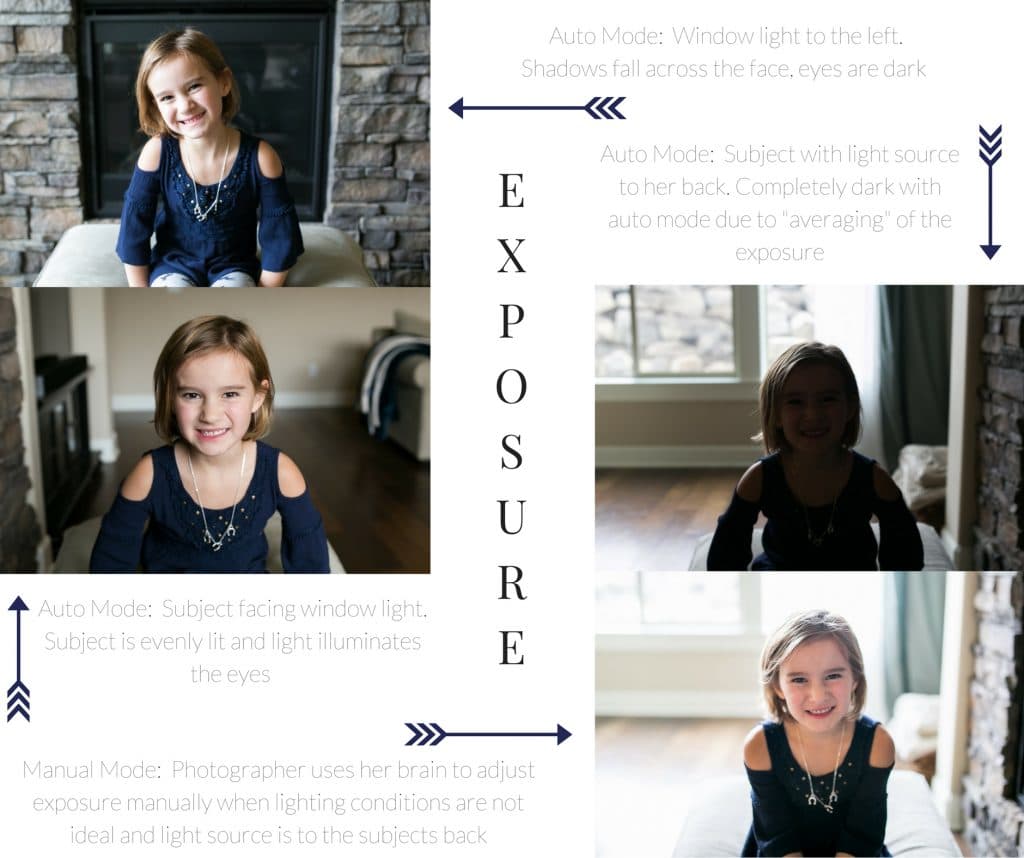
Today I’m starting really simple, with the very basic of light, which is exposure of the subject. Your subject must be WELL exposed. It seems kind of basic and boring, but I think most people miss this right out of the camera because, well, you can see the subject so that must be exposed, right??? WRONG! Especially when shooting human subjects, the faces and eyes need to be well lit, and exposing for those properly is one of the keys to this! The problem with shooting in “auto” mode or on a phone camera, the camera doesn’t have an actual human brain to know what the subject of the photo is, so it decides how much to “expose” using its internal light meter. It does this by “averaging” the brightness across the entire scene and makes an “average” determination of what the exposure of the photo should be, resulting in an “average”-looking exposure.
This is all fine and dandy if you have the same exact brightness across the entire scene or your subject in the brightest object in the photo, however, in most real world circumstances around you, you will see a wide range of shadow and light, which really goofs things up for the camera. Plus the human face is most often not one of the brightest elements in a natural scene, which in my experience, usually results in under exposed subjects (dark photos).
How do you get it right then? Now for some practical tips to try, starting with the simplest to more complex:
1. Turn your subject toward the largest light source. Seems like a DUH, but it really isn’t. You know how many years I just tried to rely on my camera without actually stopping to look around and leverage the available light? You’d be surprised how easy this is to forget. Before you position your subject, LOOK FOR THE LIGHT!! Stop worrying about a cool background and instead look for the GOOD LIGHT that will illuminate faces EVENLY and puts light in the eyes. It’s better for the background to fall away and the subject to stand out. Examples of good light sources to look for:
-Indoors: natural window light is MONEY. Make the most out of the windows by positioning subjects close to them, either facing them or slightly to the side.
-Outdoors: On a sunny day, find open shade for even light on face, but faces should be toward the open area (not toward the shade source). It’s the same for on a cloudy day, you just don’t need to find the shade. For both, pay special attention to the eyes. If you can’t see light reflecting back from them, then the camera won’t either.
-Look for natural reflectors: Any bright source that reflects light back on the subject is a great thing to utilize. Consider sidewalks, open areas of sky, a wheat field, glare off of a lake or stream, a white fence or wall, etc.

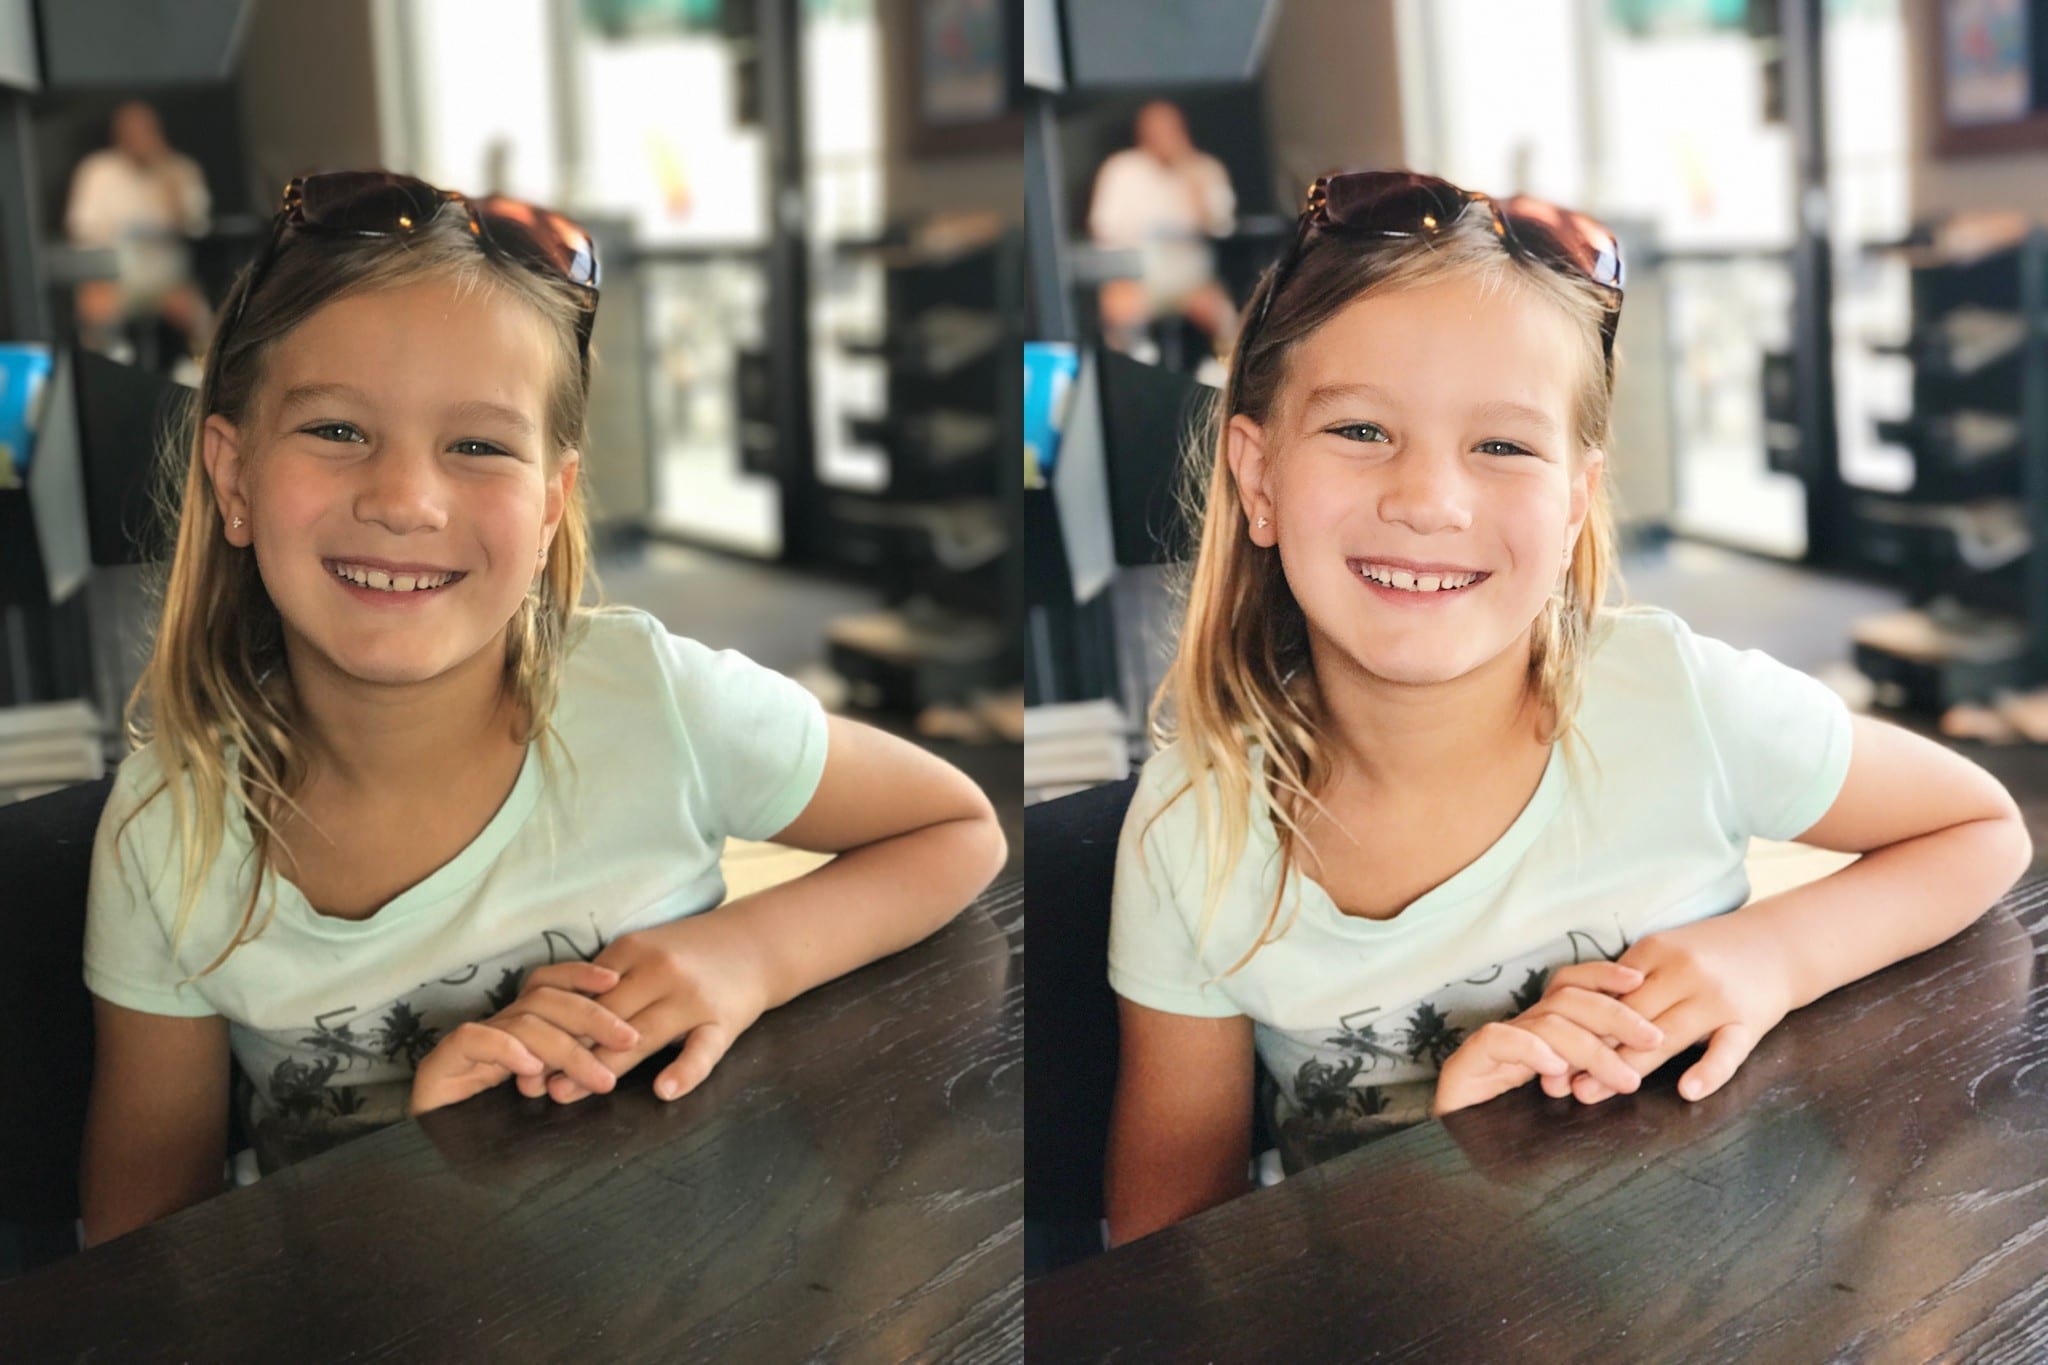
2. If using a phone (or an iphone at least, not sure how this works on an android…), tap on the subject’s face or the main subject of the photo. This will adjust the exposure for that particular area of the photo. You can also slide your finger up or down to brighten or darken as you like. If you are using a DSLR or a point-and-shoot in auto-mode, you will need to do this after the fact, by adjusting exposure in an app or a program like Lightroom. For phone apps, my favorite is VSCO. It’s free and has a lot of functions you can control.
-The KEY here is to really brighten it up! It takes practice looking at good photos and getting an eye for this, but an exposed face is usually brighter than you think! So brighten it up, and then brighten it up a little more!

3. Learn to shoot in manual mode on a DSLR. This is those of you who really want to learn the depths of photography. Learning this will change everything for you because you have all the creative control, plus you really learn how your camera works and “sees” light. I already have some tutorials written up about this, and will likely just be posting these on my blog soon, for those who really want to practice. However, this is too in-depth for a Facebook post!

Now for the fun, for those of you who want to practice. Take some pics with each of the light source examples I mentioned above and use your tools to optimize the exposure. Move the subject around and compare with your subject facing the light, away from the light, and to the side of the light. You can use a still like object, but I find it’s better to practice on a willing human so you can see where shadows fall on the person’s face. Starting to pay attention to the shadows will also be valuable for future tutorials!

Thank you thank you thank you!